 订阅
订阅原版Windows10免封装跳过oobe定制专属系统
来源:网络收集 点击: 时间:2024-03-03进入IT天空优启通的Windows10 PE
2/6用Easy Image X展开Windows10映像到C盘,不要重启
3/6在C:\Windows下新建panther文件夹
 4/6
4/6在C:\Window\panther文件夹下新建文本把下面代码复制进去重命名为Unattend.xml注意后缀名
?xml version=1.0 encoding=utf-8?
unattend xmlns=urn:schemas-microsoft-com:unattend
settings pass=windowsPE
component name=Microsoft-Windows-International-Core-WinPE processorArchitecture=amd64 publicKeyToken=31bf3856ad364e35 language=neutral versionScope=nonSxS xmlns:wcm=http://schemas.microsoft.com/WMIConfig/2002/State xmlns:xsi=http://www.w3.org/2001/XMLSchema-instance
SetupUILanguage
UILanguagezh-CN/UILanguage
/SetupUILanguage
InputLocalezh-CN/InputLocale
SystemLocalezh-CN/SystemLocale
UILanguagezh-CN/UILanguage
UserLocalezh-CN/UserLocale
/component
component name=Microsoft-Windows-Setup processorArchitecture=amd64 publicKeyToken=31bf3856ad364e35 language=neutral versionScope=nonSxS xmlns:wcm=http://schemas.microsoft.com/WMIConfig/2002/State xmlns:xsi=http://www.w3.org/2001/XMLSchema-instance
ImageInstall
OSImage
InstallToAvailablePartitionfalse/InstallToAvailablePartition
WillShowUIOnError/WillShowUI
/OSImage
/ImageInstall
UserData
ProductKey
Key*****-*****-*****-*****-*****/Key
WillShowUIOnError/WillShowUI
/ProductKey
AcceptEulatrue/AcceptEula
FullNameWindows8/FullName
OrganizationWORKGROUP/Organization
/UserData
/component
/settings
settings pass=oobeSystem
component name=Microsoft-Windows-Shell-Setup processorArchitecture=amd64 publicKeyToken=31bf3856ad364e35 language=neutral versionScope=nonSxS xmlns:wcm=http://schemas.microsoft.com/WMIConfig/2002/State xmlns:xsi=http://www.w3.org/2001/XMLSchema-instance
OOBE
SkipMachineOOBEtrue/SkipMachineOOBE
SkipUserOOBEfalse/SkipUserOOBE
/OOBE
AutoLogon
UsernameAdministrator/Username
Enabledtrue/Enabled
LogonCount1/LogonCount
/AutoLogon
LogonCommands
AsynchronousCommand wcm:action=add
CommandLine%WINDIR%\1.cmd/CommandLine
DescriptionActive/Description
Order1/Order
/AsynchronousCommand
/LogonCommands
/component
/settings
settings pass=specialize
component name=Microsoft-Windows-Shell-Setup processorArchitecture=amd64 publicKeyToken=31bf3856ad364e35 language=neutral versionScope=nonSxS xmlns:wcm=http://schemas.microsoft.com/WMIConfig/2002/State xmlns:xsi=http://www.w3.org/2001/XMLSchema-instance
ComputerName*/ComputerName
TimeZoneChina Standard Time/TimeZone
/component
component name=Microsoft-Windows-Security-SPP-UX processorArchitecture=amd64 publicKeyToken=31bf3856ad364e35 language=neutral versionScope=nonSxS xmlns:wcm=http://schemas.microsoft.com/WMIConfig/2002/State xmlns:xsi=http://www.w3.org/2001/XMLSchema-instance
SkipAutoActivationtrue/SkipAutoActivation
/component
/settings
cpi:offlineImage cpi:source=wim:f:/install.wim#Windows 8 Pro xmlns:cpi=urn:schemas-microsoft-com:cpi /
/unattend
 5/6
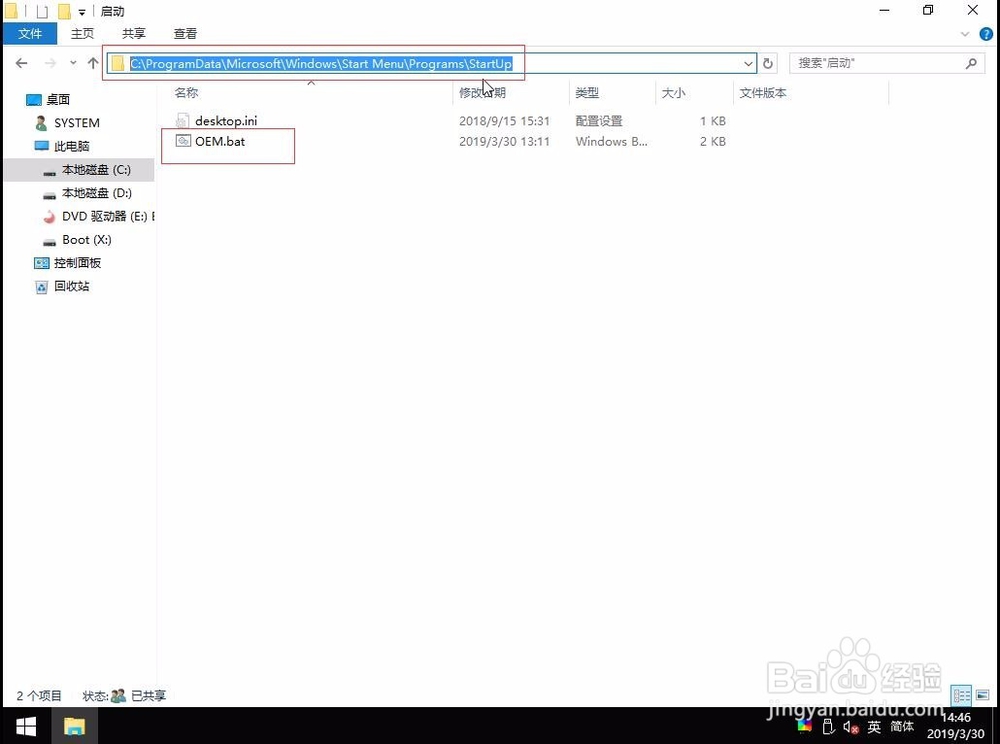
5/6虽然能跳过去了,我还想在进桌面后安装必要的软件,比如输入法,压缩软件,运行库等,这就需要运用批处理了,下面的代码复制到文本另存为*.bat,批处理放到C:\ProgramData\Microsoft\Windows\Start Menu\Programs\StartUp文件夹下就可以进桌面自动安装了
@echo off
if not %~1==p start /min cmd.exe /c %0 pexit
nul 21 %SYSTEMROOT%ystem32\cacls.exe %SYSTEMROOT%ystem32\configystem
if %errorlevel% NEQ 0 (
goto UACPrompt
) else ( goto gotAdmin )
:UACPrompt
echo Set UAC = CreateObject^(Shell.Application^) %temp%\getadmin.vbs
echo UAC.ShellExecute %~s0, , , runas, 1 %temp%\getadmin.vbs
%temp%\getadmin.vbs
exit /B
:gotAdmin
if exist %temp%\getadmin.vbs ( del %temp%\getadmin.vbs )
start /wait C:\SYS\OEM信息.bat
start /wait C:\SYS\设置壁纸.bat
start /wait C:\SYS\更改电源睡眠.ba
start /wait C:\SYSougoupinyin.exe /S
start /wait C:\SYS\WinRAR.exe /S
start /wait C:\SYS\Flash.Player.NPAPI.exe /VERYSILEN
start /wait C:\SYS\Flash.Player.PPAPI.exe /VERYSILEN
rd /s /q C:\SYS
del %0
exit
至于批处理需要运行什么就要看你自己的需要了,我是用了几个批处理更改了壁纸,调整睡眠方案,安装了输入法和压缩软件,更改了计算机OEM信息,你也可以安装运行库,支持静默安装的软件都可以的,发挥你的想象力吧
 6/6
6/6更改完毕记得保存映像放到U盘,配合IT天空优启通Easy Image X恢复映像时勾选万能驱动,这样部署时就可以自动安装驱动了,完美!
注意事项批处理start /wait 后面的是想安装的软件路径,根据自己需要修改
自动应答文件来源于网络修改而来
软件系统WINDOWS10版权声明:
1、本文系转载,版权归原作者所有,旨在传递信息,不代表看本站的观点和立场。
2、本站仅提供信息发布平台,不承担相关法律责任。
3、若侵犯您的版权或隐私,请联系本站管理员删除。
4、文章链接:http://www.1haoku.cn/art_226667.html